A misconception that is commonly passed around many design and engineering industries is the idea that for any given problem, there will only be one definitive solution. In actuality, in any given project, there are usually many different possible solutions, all differing from each other determined by varying factors such safety, cost, constructability, and usability, to name a few. Where there is a possible many solutions, there are also many possible wrong approaches to a solution. Given the vast range of possibilities, it can be beneficial to expand the scope of a problem to include a broader pool of designers, where diverse ideas can lead to more creative and innovative solutions. This is sometimes the method that large companies takes to arrive to a better solution. in the case of NASA, they are recently taking this approach, again, to narrow down to an appropriate design for the South Pole Safety: Lunar Rescue System. NASA has taken this problem to the public to challenge anyone to voluntarily submit a design that they think works best.
The problem overview is available on their website, but to summarize their requirements: if an astronaut were to become incapacitated, another astronaut should be able to use simple, user-friendly rescue equipment to safely transport the injured crewmember back to the human landing system. The website gives some specifics about the harsh environment that this safety equipment would have to operate in, along with some other requirements that it would have to meet to make it practical for astronaut use, such as the requirements of being low in mass, easily deployable, and can transport an astronaut up to 2 km. By presenting this challenge to the public, it offers a unique opportunity to apply common design practices to a problem that is truly ‘out of this world. Even if someone would not wish to actually submit a design, or is late to the deadline, this still serves as a great thought experiment. At first, any task can seem overbearing, but common design processes can be applied to break the project into smaller, more manageable parts. Let’s work at the problem and break down this task to something manageable.
The relative information to this scope can be found here:
https://www.herox.com/NASASouthPoleSafety
Overview of the Design Process
When defining the design process, there are different steps and stages that happen at certain sequences, and depending on where you look up an example of this process (especially between different design disciplines), you may find some variance. When comparing these processes against each other, you will find that there are common themes and practices, even if they are referred to as something different. And some of these steps will connect back to earlier steps at points of required iteration. For our purposes, lets refer to a process that aligns closer to engineering design with the following steps:
Ask: Identify the need and constraints
Research: Gain knowledge to help address the problem
Imagine: Draft out some possible solutions
Plan: Select a promising solution and refine
Create: Make a prototype
Test: Define successes and areas for improvement
Improve/Iterate: Start the process again
At any point of these processes, if something is not working, it is encourages to loop back to a previous step.
Identifying First Considerations – Ask and Research
The first stage of the design process have been provided by the nasa.gov website. By reviewing their description of the required design, we gain an initial understanding of the needs and constraints. Their guidelines reveal the purpose of the apparatus, the challenges to address, the essential features, the functional environment, the rules, and even a scoring system. From this step, the research phase can begin. A great way to begin the research is to research past lunar or space equipment that has already been and is currently been in use. This is a common design practice that is usually encourage anywhere you work, since a design that a client has already approved is one that they will gravitate towards if similarities are utilized in newer scopes. This can give us a hint to many variables, such as the materials required, how simple or complex the client wants to see the concept, and the novelty of the concept, to name a few. There are numerous directions the research could take, as further exploration and idea development may lead the designer down various paths. However, for the starting point of a lunar rescue system, some suggested starting points include the following:
- Clients development history
- Past projects and designs used in similar environments, such as past lunar expeditions, rovers sent to other planets.
- The environment which the apparatus will function in (large temperature swings, regolith properties, terrain)
- Limitations brought upon environment (regolith wear and tear, minimal exposure of moving parts and hinges to the elements)
- The material best suited in the environment and their material properties. Will the material experience too much expansion and contraction from the immense temperature swings? Will it’s properties vary on the lunar surface, such as increased brittleness from non atmospheric sun exposure? Will it’s density being unforeseen issues? Remember, an objects weight will be less on the moon, but it’s mass is consistent, which will play important factors in it’s inertia.
- Similar devices that are currently in use that follow similar guidelines, even if the similarities are few. Don’t be reluctant on taking inspiration from pre existing designs that are proven to work. You would be surprised on how often clients like recycling old ideas that prove to work, even among differing design industries.
- Get familiar with the AxEMU, as this is what the device will directly interact with. From some inspection, it has attach points built into the suit. This might be a good starting point to conceptualize something
- Advice from professionals working in the industry, or in similar industries (If you can’t readily contact someone, you can always review interviews or written material by said professionals)
Again, this is a simple starting points to the research process. Once you begin to dive deeper into each category, you will find that there will be other areas that you will be required to educate yourself in. It may seem to be overwhelming at the beginning, but remember, the knowledge behind each project always starts from zero. Each minute spent researching will gain you more and more understanding until you get to a point that your understanding and confidence in the material becomes incomparable from before you started.
Begin Building a Concept – Imagine and Plan
Once the first stage of research has reached a point to where you have a solid understanding of the individual factors, it then comes time to sketch out a variety of ideas for a concept. This phase can put you through your paces, as even finding a starting point to how you want to solve the problem can be a large first hurdle. As part of the restraints for the lunar rescue system, the apparatus can not exceed a mass of 23kg, while being capable of maneuvering an incapacitated astronaut with a mass of 343kg across distances up to 2km. it must be easy to deploy, easily transportable, and must be capable of functioning under extreme conditions. Considering this, and the other restrictions mentioned on the official website, one of the best approaches is to just start sketching out anything that comes to mind, aided by the research you first begun with. Even if, and when, most of your initial concepts are duds, each step will spark more inspiration, and you can being to understand why some ideas work where others are not qualifiable. While sketching our your ideas, here are some suggestions to keep in mind as you progress:
- How and where will this apparatus be use? Can one person use it, and how easily can they use it? Is it too difficult to set up?
- How will the incapacitated astronaut interact with the apparatus? Is it easy to get them onto the apparatus? Are there pinch points in any moving parts? Will moving parts be inhibited by immense interaction with regolith? Can one person reasonably position the apparatus and patient properly so it can function?
- Does it require an external power to operate? Will there be a back-up method bult into it so it can function without the use of a power source?
There are many examples other than the ones mentioned that can be used to lead yourself to a realistic concept, but as you continue, it is essential to find more of these design questions to further the development of your design. Other significant and unexpected factors can affect even the smallest aspects of the design. However, a helpful way to move your design toward a more practical solution is to revisit your research and envision a scenario in which the design will be used, putting yourself in the user’s shoes. Thinking deeply about these scenarios can lead you to other unforeseen but important questions. As an example, lets imagine an initial design as a rectangular shaped stretcher that can hold a person, and is compactable along its width. So far, it holds an advantage as being something that may be easy to manufacture, but imagine trying to carry the stretcher everywhere you would need to walk on the moon. On its longest side, the non compressible length of the stretcher, would probably be longer than 2 meters, so then how practical would it be to carry this long object while wearing a bulky space suit? The immediate answer is that it probably isn’t easy to carry around, so then we can derive a design question from this thought process, something along the lines of, “How can this apparatus be as easy to carry as possible while upholding its primary purpose?” After identifying this question, and many more from other thought experiments, you can begin to develop your own list of these questions that can guide you towards a better design.
Converting your Ideas into Usable Items – Create and Test
Next, it is time to take a few of your most promising ideas and make a tangible version of it and introduce it into a scenario to see how well it can function. The first method that may come to mind to achieve this may be to develop a physical prototype of your design and put it under some tests. While this is a great method to see the strengths and weaknesses of your design, it is not the only approach that you can take. In some design and engineering fields, a physical prototype is often bypassed if there is access to appropriate software that can can test a design in simulation. If both methods are used together, usually the simulation comes first before the development of a physical prototype.
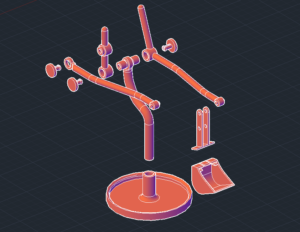
Generating a 3D model of your prototype brings many benefits to your progress. By modeling your design, any distinct errors that might have been easily overlooked become much easier to spot when you have a version to review. In many engineering fields, 3D models can be tested using specialized software for specific purposes. For example, in structural engineering, STAAD Pro can simulate forces and loads on a structure, providing results on how these affect structural members and connections. In aerospace engineering, MATLAB is commonly used to analyze kinematics, dynamics, and control of a design. While specialized software may not be accessible for your lunar rescue system project, this should not discourage you from creating a 3D model using a basic trial or free version of drafting software. The advantages of doing so are invaluable.
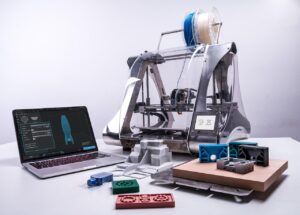
Another advantage of using a 3D model for your design is the ability to run it through 3D printing software, allowing you to print a prototype for testing. This process is particularly useful for evaluating how a finished piece will look and function at the end of a manufacturing process. Having a physical, tangible prototype enables you to handle the design firsthand, providing a clear sense of its form, functionality, and how it operates in real-world conditions. This hands-on approach offers valuable insights that can inform further adjustments before final production. If you do not have access to a 3D print, making some physical representation of the design is still encouraged. Some designers cut out the pieces out of paper and connect then together to form a paper version of their design. NASA has used miniature models in the past to validate design and engineering principles, especially in the development of the Apollo lunar landers in the 1960’s and 1970’s. They put these models through their paces with wind tunnel testing, aerodynamic testing, and design validation. As you are developing a design for a Lunar rescue system, why not take inspiration from NASA themselves and see how you can obtain insight form the same techniques.
Whichever approach you decide on taking, do not miss out on creating a physical prototype of one of your promising designs. It can easily help validate your concepts, or may bring light to an unforeseen factor of your design requiring a necessary revision.
Take your Design from Good to Great – Iterate and Improve
Now it is time to discuss the beauty (or dread) of engineering and design; constant iteration and improvement. It is a very important, and necessary, stage to striving towards the best design that someone can arrive to for a given problem. For any design that you see today, you can guarantee that there had been at least one stage of iterations, if not many, to arrive to the completed product that you see, for no design has arrived to it’s final form with no reworking, rethinking, or mental strain. This is especially true for anything developed by NASA, as many designs produced by them are designed to function in completely unfamiliar and life threatening environments. The best part about this stage is that reiteration and improvement can happen at any stage during the design process! You can even arrive to a completed prototype just to find out that you need to scrap the design and start from the beginning. But don’t be discouraged from this, because at each iteration, you’ll be that much closer to developing something that is worth the effort. Always take away the insights gained from each revision and use it to propel it to a final outcome.
The iterative design process is especially valuable in complex or innovative projects where there are numerous unknowns or where traditional design methods might not fully predict performance. If you’re a designer or engineer looking to take on such a challenge, it would be highly beneficial to explore the methods employed by NASA and other spacefaring organizations to ensure their designs function as intended. For example, NASA follows a structured, step-by-step methodology to verify that each iteration of a design inches closer to meeting the required specifications. Here are a few examples of the approaches they use:
Systems Engineering Management Plans (SEMP): This document outlines the approach to engineering and ensures compliance with requirements throughout the lifecycle. The procedure represented in this plan covers the lifecycle of the project, but this can be a great tool for reviewing some pointers that you may have missed when deciding what should be improved upon at any specific point of iteration.
Configuration Management: Ensures that all elements of the system are carefully tracked and documented, helping to avoid errors during development and integration. If you decide to utilize this, then at each point of iteration it may make it easier for you to locate and refer back to certain design choices that you may want to revisit or gain some inspiration from. This is a great tool for larger projects with many working components, but you can find use for it on smaller scale projects as well.
Reliability and Quality Assurance: NASA uses standards such as MIL-STD (military standards) to ensure quality and reliability in the engineering process.
These are a few techniques that may help spark inspiration at points of iteration, or to use them as a checklist to ensure that your design meets what it should. However, considering that many requirements for iteration are unique to the challenges for their given situation, you may find that there could be other methods available that help solve a particular problem at any given point. The important take away from all of this is that you have a methodology to recognize when there is something lacking in your design, what it is lacking, and how to find a solution. take some time to look into methodologies that have worked for others and find something that works best for you.
Conclusion
This has been an engaging design exercise, and I hope it serves as a helpful starting point or a simple guideline for designing your own Lunar Rescue System. Alternatively, it may inspire you to explore methods for tackling an entirely different design project. If there are any topics you’d like to delve into further, please feel free to comment and join the discussion.


